

Table of Contents
Acknowledging how to check for motherboard damage addressed by the GPU is very important if you have recently faced crashes, display errors, or any type of system instability. A faulty or improperly seated graphics card can also make the errors vary from minor glitches to serious hardware failure.
By acknowledging the signs of the GPU-related motherboard damage as well as learning how to inspect the different components safely, you can also prevent the long-term errors, and you can decide whether repair or replacement is important.
How a GPU Can Damage a Motherboard?
A GPU can harm a motherboard through the power surges, overheating, poor installation, faulty PCIe slots, or unstable voltage from the power supply.
Common Causes of GPU-Related Motherboard Damage
A graphics card can damage or stress the motherboard if the physical installation or power delivery goes awry during setup.
Some of the common causes involve the usage of an oversized high-power GPU on a weaker motherboard, faulty PCIe slots, poor-quality PSUs sending unstable voltage, or incorrect GPU seating.
Therefore, overheating from the inadequate airflow or dust buildup can also impact other close motherboard components. In some types of cases, damaged VRMs, bent pins, or worn capacitors worsen the risk of GPU-induced motherboard issues.
Signs of Short Circuits or Power Surges
The short circuits or the power surge might also show up through the sudden shutdowns, burning cells, visible scorch marks, or an unresponsive motherboard after the installation of a GPU.
You might also notice the GPU overheating quickly, fans spinning uncommonly, or the system failing to post anymore. In multiple cases, a blown fuse, damaged MOSFETs, or burnt the capacitor areas that appear around the PCIe slot.
These symptoms typically indicate that the power surge has impacted the core motherboard circuits.
Early Signs of Motherboard Damage After Installing a GPU
The early signs of motherboard damage after the installation of a GPU involve black screens, boot failures, beep codes, warning LEDs, overheating, instability, alongside random shutdowns. These are some of the common faulty motherboard symptoms you should watch for.
Display or Boot Issues
One of the primary signs includes the system failing to display any of the output or getting stuck in the times of boot.
You might also experience black screens, continuous reboot loops, no signal to the monitor, or freezing during the time when POST.
These types of problems often exhibit stress or damage around the PCIe slot or the related power circuits.
Beep Codes and Warning Lights
Many of the motherboards utilize the beep codes or the LED indicators for signaling the hardware errors.
The continuous beeps, GPU error lights, or the orange/red motherboard LEDs often point towards the power delivery issues or the damaged PCIe slot.
Therefore, checking your motherboard manual assists you in interpreting all these alerts correctly.
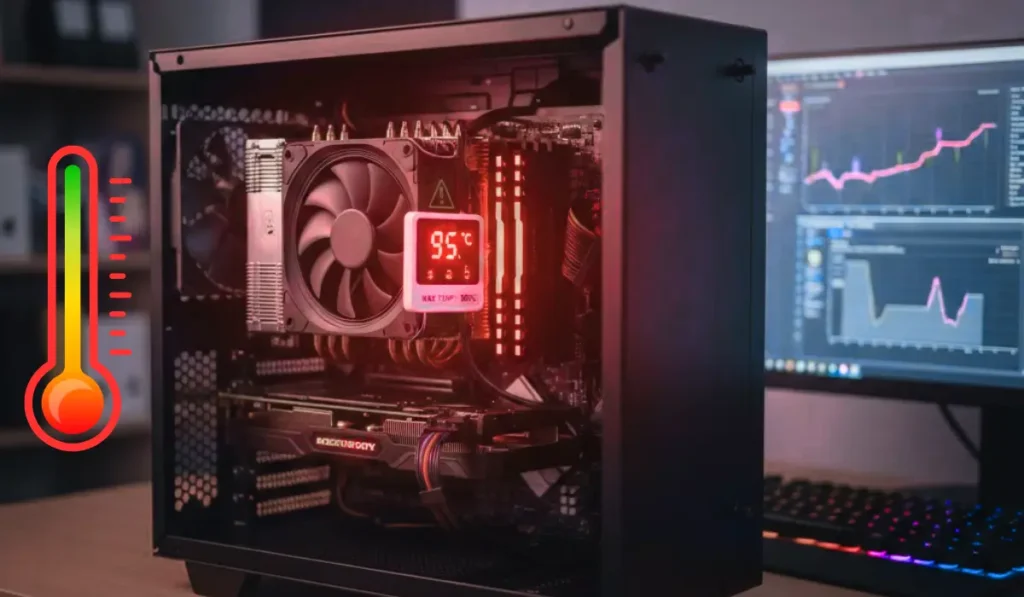
Overheating and Random Shutdowns
If your system overheats very soon after the installation of a GPU, it might also signal motherboard damage affecting the cooling or the power regulation.
Unexpected shutdowns, thermal throttling, fan spikes, or any time the system turns off under load can also point towards the compromised VRMs or failing capacitors close to the GPU slot. These types of symptoms should not be ignored, as they often worsen with time.
How to Check Motherboard Damage from the GPU?
Checking for the motherboard damage through a GPU also includes inspection of the PCle slot for the physical defects, scorch marks, or loose components, testing the system stability, as well as verifying the display output.
You can also try any other GPU, or also test your card in any different system for the confirmation of whether the error is with the motherboard or with the graphics card.
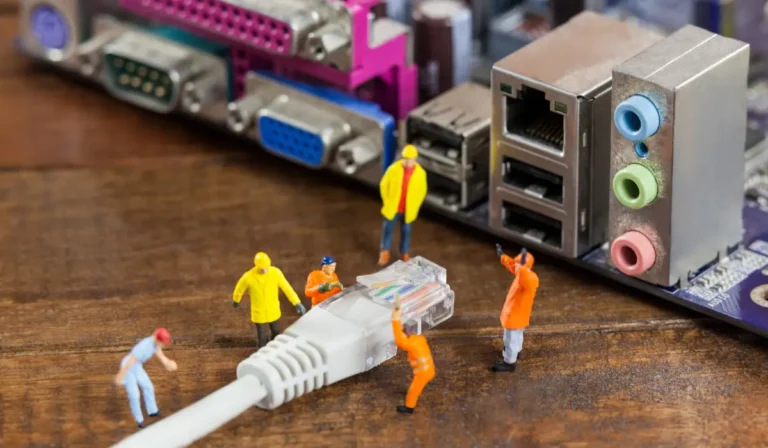
Visual Inspection of Motherboard Components
Start by removing the GPU and then examining the motherboard very closely. Look around the PCIe slot as well as the nearby components for discoloration, loose capacitors, melted plastic, or bent connectors.
While inspecting the board, it also helps to verify how many USB ports your motherboard has, ensuring none of the I/O components are damaged.
Check VRMs, capacitors, along the power delivery areas for swelling or leakage. Proper lighting with a magnifying glass can also assist in revealing small cracks or smaller damage.
Checking for Burnt Marks or Broken Pins
Burnt smells, scorch marks, or the darkened areas that surround the PCle slot are the stronger indicators of the electrical damage. Therefore, inspect the pins of the lot for bending, misalignment, or physical breaks.
Any of the melted traces, warped plastic, or damaged solder points suggested that the GPU or the power surge had stressed out the motherboard.
Testing With Another GPU or System
If the visual examination exhibits no clear harm, test the functionality. Try utilizing any other GPU in the same PCle slot to see if the motherboard detects it or not.
Similarly, install your GPU in any other working system. If the error follows the GPU, then the card is likely to be faulty. If the issue stays along the motherboard, the slot, or the power circuitry might be damaged.
How to Check Motherboard Damage from GPU Gaming?
Checking for the motherboard damage in the times of GPU gaming includes watching for the sudden FPS drops, crashes, overheating, as well as instability under load.
Stress-test the GPU alongside monitoring the temperature with the voltage spikes to identify power-related motherboard errors.
Performance Lags and Crashes During Gameplay
If the motherboard is damaged, gaming performance eventually drops noticeably. You might also experience sudden FPS dips, stuttering, audio glitches, or complete game crashes.
These types of symptoms occur just because of the damaged power circuits or the PCIe connections struggle to deliver stable power for the GPU during high-load gaming.
Frequent driver resets, screen flickering, or the game freezing under the heavy graphics requirement can also indicate motherboard instability rather than any simple software issue.
Stress Testing the GPU and Monitoring Temperatures
Running the stress tests such as FurMark, 3DMark, or Unigine Heaven can also detect the instability resulting from the motherboard issues.
If the system overheats quickly, shuts down, or the GPU throttles uncommonly despite the normal cooling, the motherboard’s VRMs or the PCIe slot might be compromised.
Utilize the tools such as the MSI Afterburner or the HWMonitor for tracking the temperatures, as well as the GPU load. Sudden spikes of temperature or unstable voltage readings are powerful signs of underlying motherboard errors.
How to Detect Motherboard Problems Using Software?
Detect the problems of the motherboard by utilizing the software monitoring voltages, temperatures, as well as system stability, along with the tools, including the HWiNFO, HWMonitor, as well as BIOS diagnostics.
Best Motherboard Checker Software
Multiple tools can assist in identifying the motherboard-related errors without even opening your PC.
Programs such as the HWMonitor, HWiNFO, AIDA64, alongside the Speccy monitor, voltage stability, temperatures, fan speeds, as well as component health.
If the VRMs or sensors of the motherboard are malfunctioning, these types of tools often display irregular readings or missing data.
For deeper diagnostics, OCCT along the Prime95 can stress the overall system to reveal the power delivery or the stability problems often linked to the motherboard faults.
How to Use System Diagnostic Tools (Windows, BIOS, Third-party)
Begin with the Windows built-in tools, such as the Event Viewer, as well as Windows Memory Diagnostic, to check for the hardware-related problems or instabilities.
Booting in the BIOS/UEFI lets you monitor the voltages, temperatures, as well as system health indicators directly by the motherboard. The third-party tools, like the HWiNFO or the AIDA64, permit continuous monitoring in the times of workload tests.
Sudden voltage drops, abnormal temperature spikes, sensor failures, or any type of inconsistent readings commonly exhibit the underlying motherboard errors.
You May Like This: Are AM5 Motherboards Compatible with AM4 CPUs?
How to Test CPU and Motherboard?
Test the CPU along with the motherboard utilizing the POST beep codes, diagnostic LEDs, or by swapping the CPU to identify the hardware errors.
Using the Post Test or Beep Codes
The Power-On Self-Test (POST) checks the central motherboard as well as the CPU functionality in the times of startup.
Beep codes or the diagnostic LEDs exhibit particular errors, like CPU failure, RAM issues, or motherboard faults.
Refer to your motherboard manual for the accurate interpretation of the codes. Repeated or unusual beeps might also signal serious hardware problems needing further inspection.
Swapping the CPU for Troubleshooting
If POST shows the CPU or motherboard errors, testing with a known working CPU can also isolate the faulty component.
If the system works with the replacement CPU, the original processor might be defective. If the problems persist, the motherboard is more likely to require repair or replacement.
Can a Damaged GPU Damage a Motherboard?
A damaged or faulty GPU can pivotally damage the motherboard. Short circuits, overvoltage, or overheating from any malfunctioning graphics card can stress out the PCIe slot, VRMs, or any nearby components.
Poorly seated GPUs or the cards drawing excessive power might also cause permanent damage, resulting in instability, burnt traces, or failed components on the motherboard.
Is There a Way to Check if a Motherboard Is Damaged?
You can also check for the motherboard damage by a combination of visual inspection, software diagnostics, as well as hardware tests. Look for any burnt marks, swollen capacitors, or bent pins.
Utilize diagnostic software such as the HWiNFO or BIOS monitoring to check voltages with temperatures. Testing with any other GPU or CPU also assists in isolating motherboard issues.
How Do I Know if My Motherboard or GPU Is Bad?
Differentiating between a bad motherboard and a faulty GPU includes systematic testing. Swap the GPU into any other working system or utilize a different GPU in your motherboard.
Monitor for display issues, crashes, or overheating. POST codes, beep sounds, as well as the diagnostic LEDs, give further clues. Consistent problems along multiple GPUs typically point towards motherboard damage.
You May Like This: Are AM5 Motherboards Compatible with AM4 CPUs?
How to Prevent GPU-Related Motherboard Damage?
Prevent the GPU-related motherboard damage by utilizing any quality PSU with surge protection, keeping the drivers along BIOS updated, and also ensuring the proper cooling with proper airflow.
Use a Quality Power Supply and Surge Protection
A reliable PSU guarantees the stable power delivery to both the GPU and the motherboard, decreasing the risk of voltage spikes or the risk of short circuits.
Pair it with any surge protector or any UPS to guard against sudden power surges that can also harm the sensitive components. Avoid cheap or underpowered PSUs that might fail under high GPU loads.
Keep GPU Drivers and BIOS Updated
Updating the GPU drivers guarantees proper communication between the graphics card and motherboard, avoiding any crashes or instability.
Likewise, keeping your motherboard BIOS up to date enhances compatibility as well as power management, decreasing the risk of damage from improperly handled GPU commands or any type of power draw.
Maintain Proper Cooling and Airflow
Overheating can also strain both the GPU along the motherboard components. Guarantee a sufficient airflow inside the case.
Clean the dust from the fans alongside heatsinks on a daily basis, as well as consider the additional cooling solutions if essential. Proper thermal management avoids the VRM stress, capacitor damage, along overall system instability.
Conclusion
Motherboard damage from any GPU can end up with serious system instability, display issues, along hardware failure. Identifying early signs like the boot problems, overheating, or uncommon beep codes is essential. Regular visual inspections, software diagnostics, the stress testing assist in detecting issues before they worsen.
Preventive measures involving utilizing a quality PSU, maintaining proper cooling, with keeping drivers and BIOS updated can protect your system and also extend the lifespan of both your GPU and the motherboard.
FAQ’s
Can GPU sag damage my motherboard?
Yes, severe GPU sag can also put stress on the PCIe slot, as well as it might cause poor contact, instability, or long-term damage. However, mild sag is typically harmless if temperatures with the performance remain normal.
How to tell if a GPU is physically damaged?
Check for bent or any burnt components, cracked solder joints, harmed PCIe connectors, typically high temperatures, artifacts on the screen, or the GPU failing for the detection of the system.
Can a motherboard bottleneck a GPU?
Yes. Older motherboards with the slower CPUs, outdated PCIe versions, or the limited bandwidth can bottleneck the high-end GPU alongside decrease in performance.
What is the best fix for GPU sag?
Utilize a GPU support bracket, vertical mount, or adjust the cable support. Most of the support brackets are inexpensive as well, and they effectively eliminate sag.
What is the lifespan of a GPU?
A well-maintained GPU commonly lasts 5–8 years, depending on use, cooling, along the workload. High temperatures or any heavy continuous load can shorten its lifespan.